Part 1: Hardware
The ESP32-Wifi CAM
The ESP32 is a family of microcontrollers that include built-in Wi-Fi and Bluetooth connectivity. Developed by Espressif Systems, these chips are more powerful than basic Arduino microcontrollers like the Uno, featuring faster processors, more memory, and dual-core options in some models. The inclusion of wireless radios directly on the chip allows projects to connect to the internet or other devices without adding separate modules, making it a common choice for Internet of Things (IoT) applications.
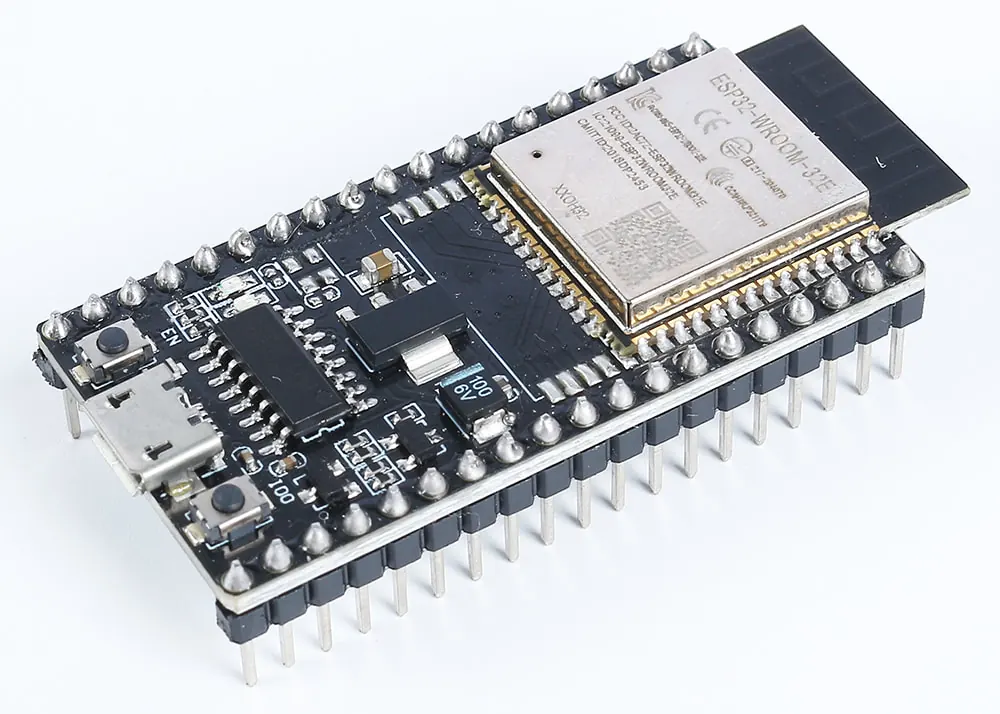
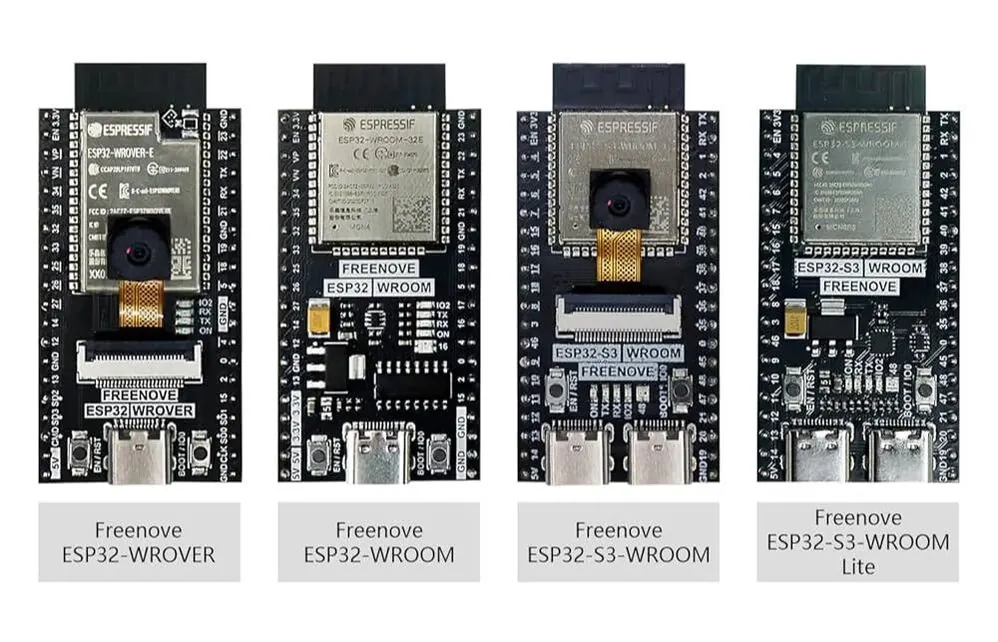
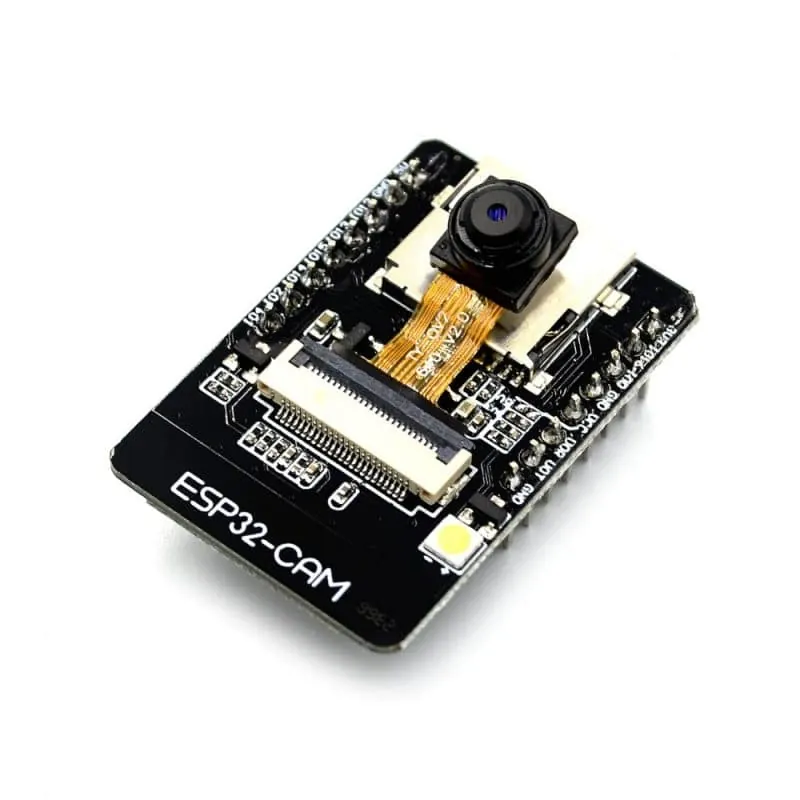
A specific model within this family is the ESP32-CAM, which integrates a camera module directly onto a compact development board. This model combines the general computing and wireless features of the ESP32 with the ability to capture still images and video. The "CAM" designation refers to the inclusion of the camera hardware, which is the primary feature that distinguishes it from other ESP32 development boards.
A specific model within this family is the ESP32-CAM, which integrates a camera module directly onto a compact development board. This model combines the general computing and wireless features of the ESP32 with the ability to capture still images and video. The "CAM" designation refers to the inclusion of the camera hardware, which is the primary feature that distinguishes it from other ESP32 development boards.
 |
 |
 |
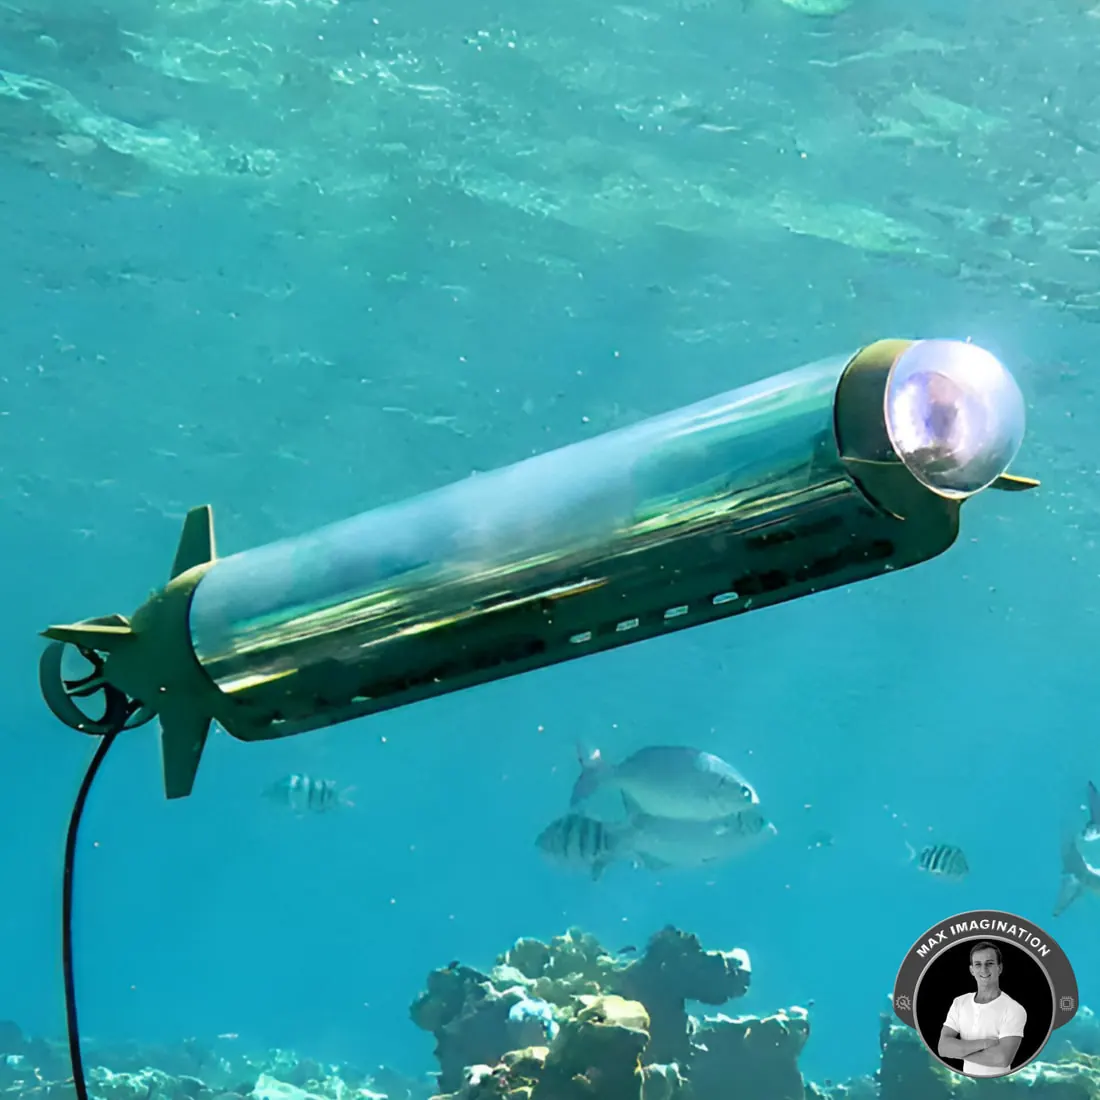
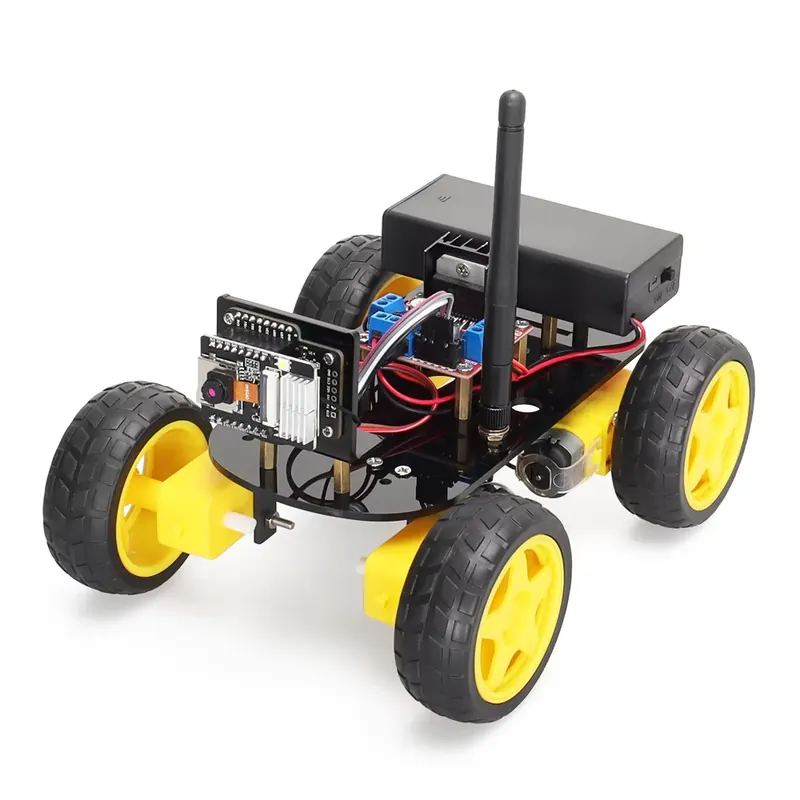
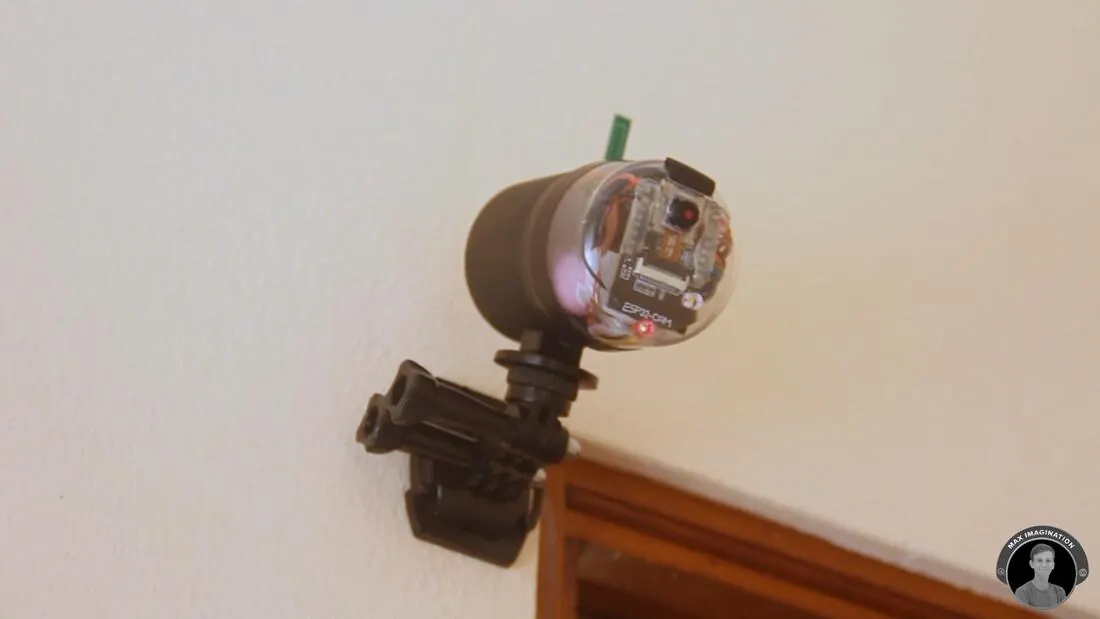
The ESP32-CAM module is often used when a project requires both visual input and wireless communication. For example, it can be configured to take a picture or video and send over a Wi-Fi network to a computer or a cloud service. The board's small size and integrated components make it suitable for applications like simple security monitors, wildlife cameras, or video streamers for DIY robots. Because the camera and wireless functions use significant power, the module typically requires a stable external power supply rather than drawing power from a computer's USB port during operation.
 |
 |
 |
Core Hardware Components
At the center of the board is the ESP32 system-on-chip (SoC), which includes a dual-core processor, Wi-Fi, and Bluetooth radios. The SoC is paired with an OV2640 camera sensor capable of capturing still images and video. To manage the data involved in image processing, the board includes additional PSRAM (Pseudo Static RAM). A microSD card slot provides storage for captured images, and a set of GPIO pins allows connection to other components.
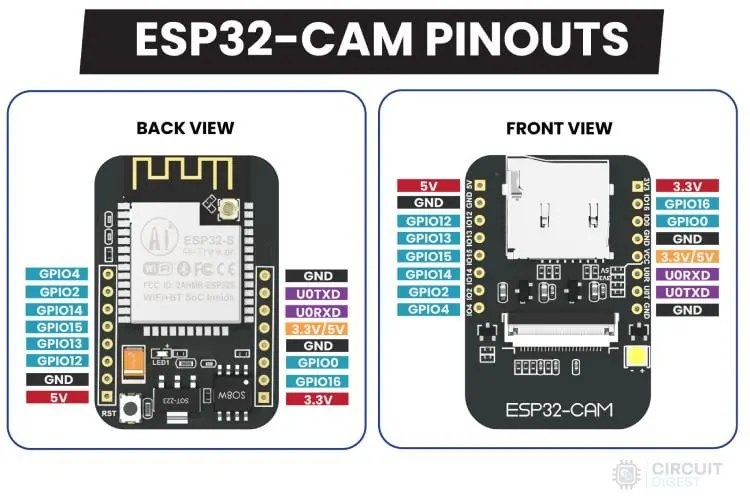
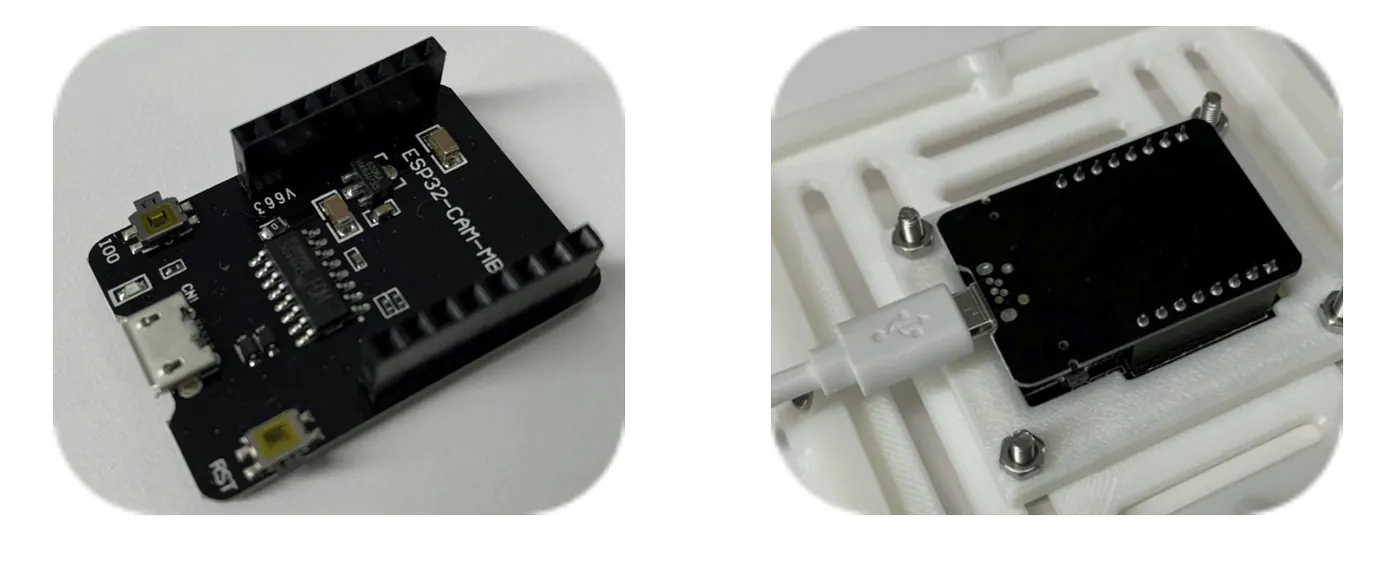
Note that there is a physical reset button at the bottom left corner of the back view.
Setting Up the Development Environment
To program the ESP32-CAM using the Arduino IDE, you need to add support libraries for ESP32 boards. This is done by adding a board manager URL in the IDE preferences and installing the "esp32" package. After installation, you can select "AI-Thinker ESP32-CAM" from the board list. Uploading code requires putting the board into bootloader mode, which typically involves connecting a specific pin to ground during startup, and using a separate USB-to-serial adapter since the module lacks a built-in USB port. Specific example is provided in the integrated project.
Part 2: Integrated Projects
Exercise : Connecting ESP32 WiFi Camera
Objective: To enable real-time video streaming from the ESP32 wifi camera to mobile devices.
|
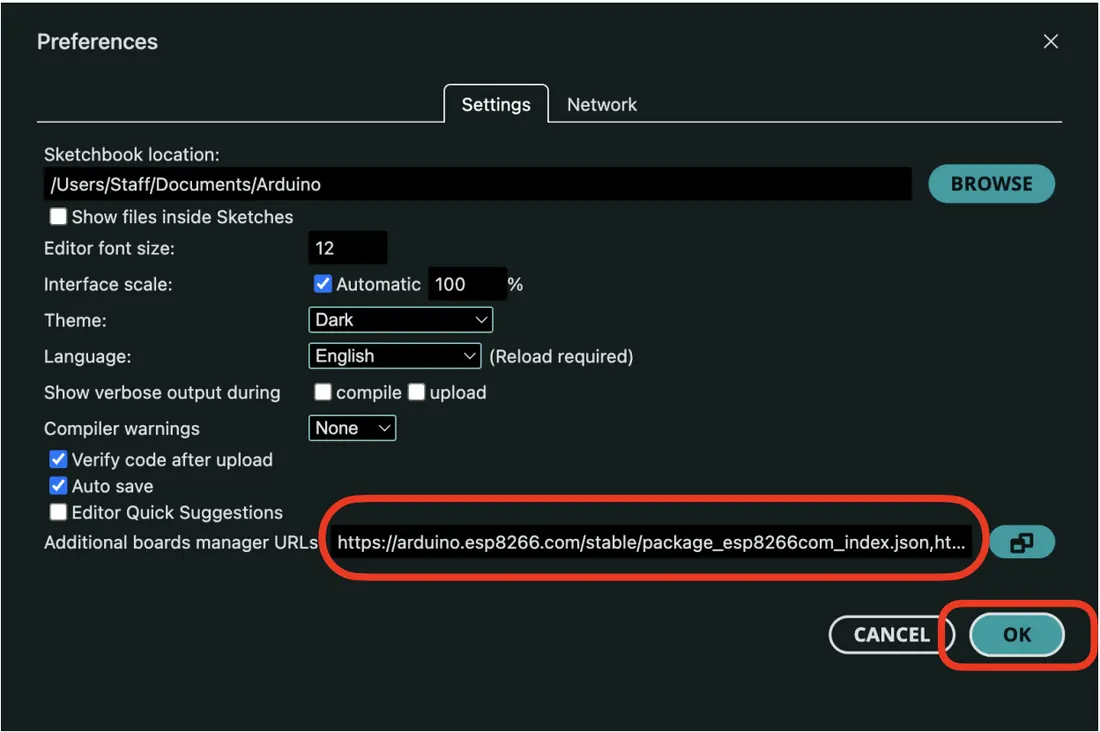
Step 1:
Navigate to Setting/Preferences/Additional boards manager URLs and paste: https://arduino.esp8266.com/stable/package_esp8266com_index.json, https://dl.espressif.com/dl/package_esp32_index.json |
 |
|
Step 2:
Navigate to Tools/Board manager and download the latest version of “esp32” package provided by “Espressif Systems”. |
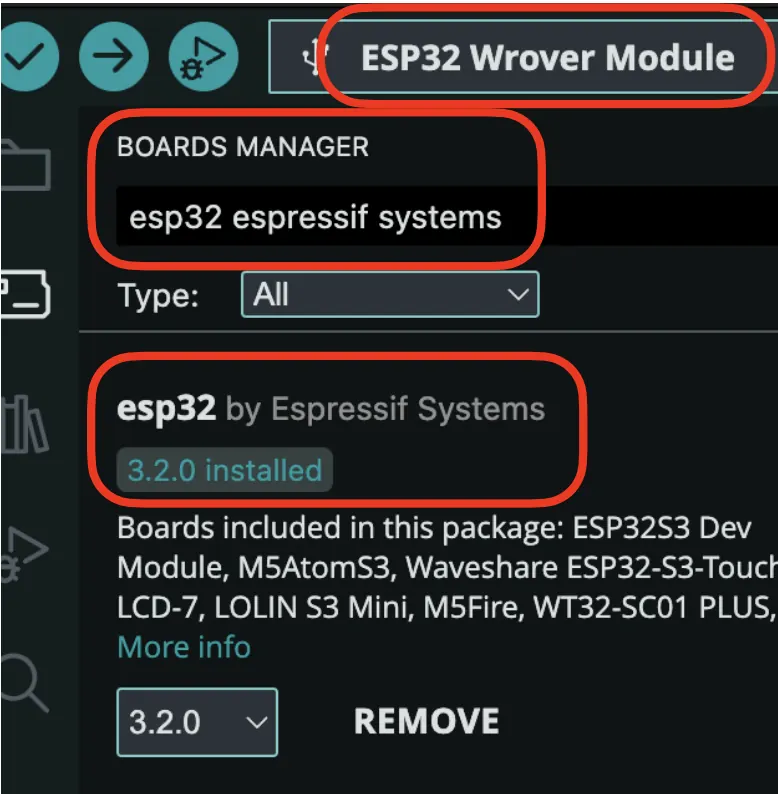 |
Step 3: Mount the ESP32 wifi cam on the Interface Board, then connect them with the computer using a USB micro cable.
|
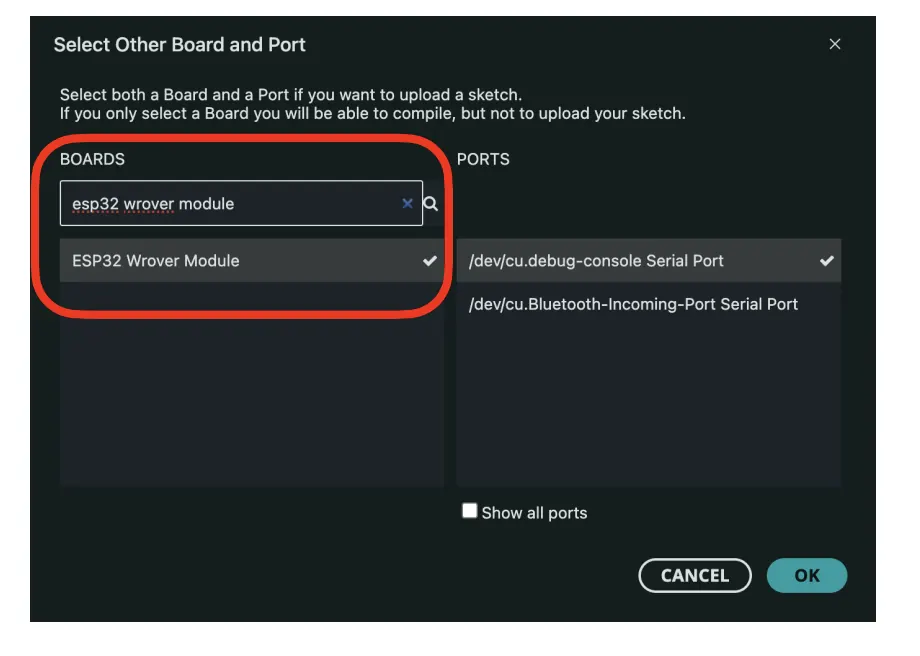
Step 4: Select “ESP32 Wrover Module” in the Select Other Board and Port selection, and click “OK”.
|
 |
|
Step 5:
|
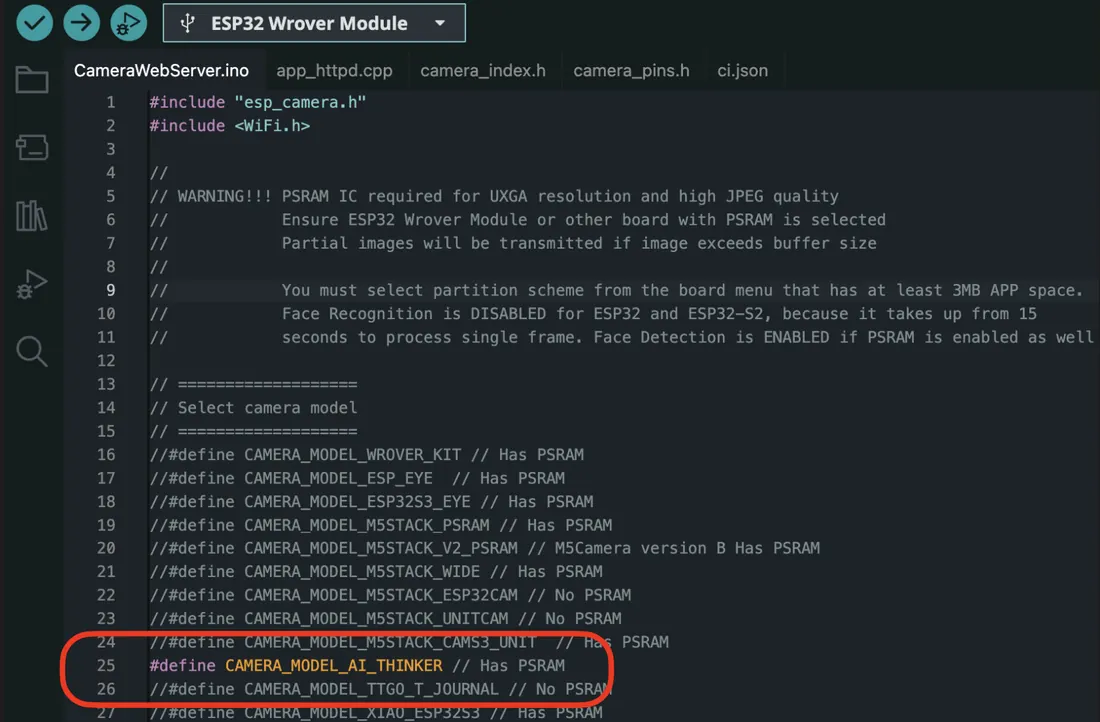 |
Step 6: Navigate to Tools and perform the following changes:
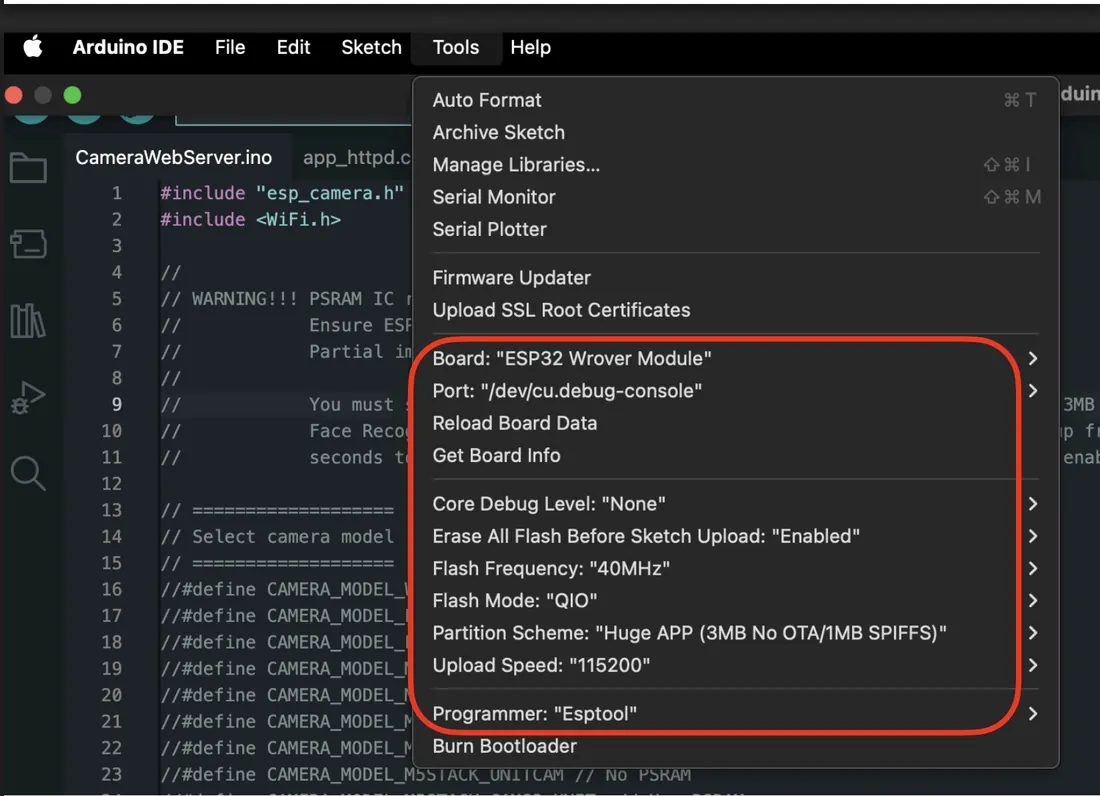
- Port: “COM3 (Arduino Uno)” or your own respective port. (Ex: /dev/cu.usbserial-110)
- Flash frequency: “40MHz”
- Flash Mode: “QIO”
- Partition Scheme: “Huge AP (3MB No OTA/1MB SPIFFS)”
- Upload Speed: “115200” f. Programmer: “Esptool”
|
Step 7:
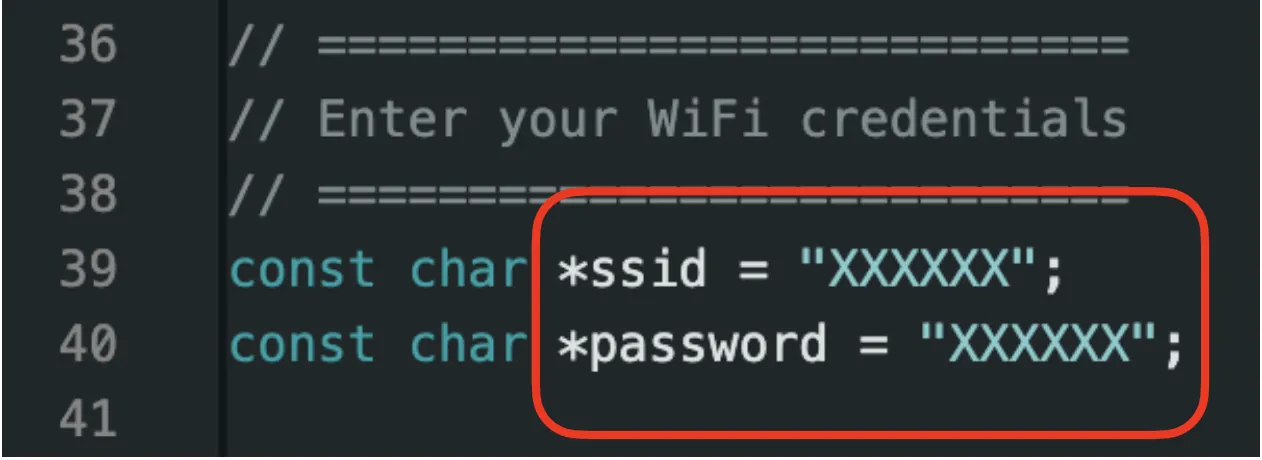
Change the ssid and password using your local wifi settings. |
 |
Step 8:
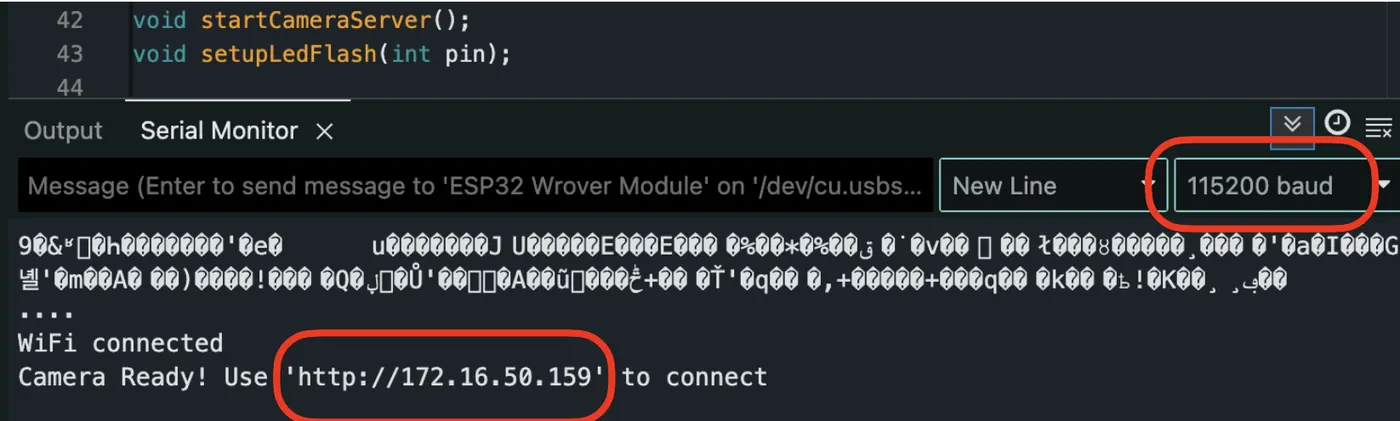
Upload the code and open Serial Monitor at 115200 baud.
If needed, press the ESP32-CAM's reset button. The streaming URL will appear in the serial monitor.
Upload the code and open Serial Monitor at 115200 baud.
If needed, press the ESP32-CAM's reset button. The streaming URL will appear in the serial monitor.
|
Step 9:
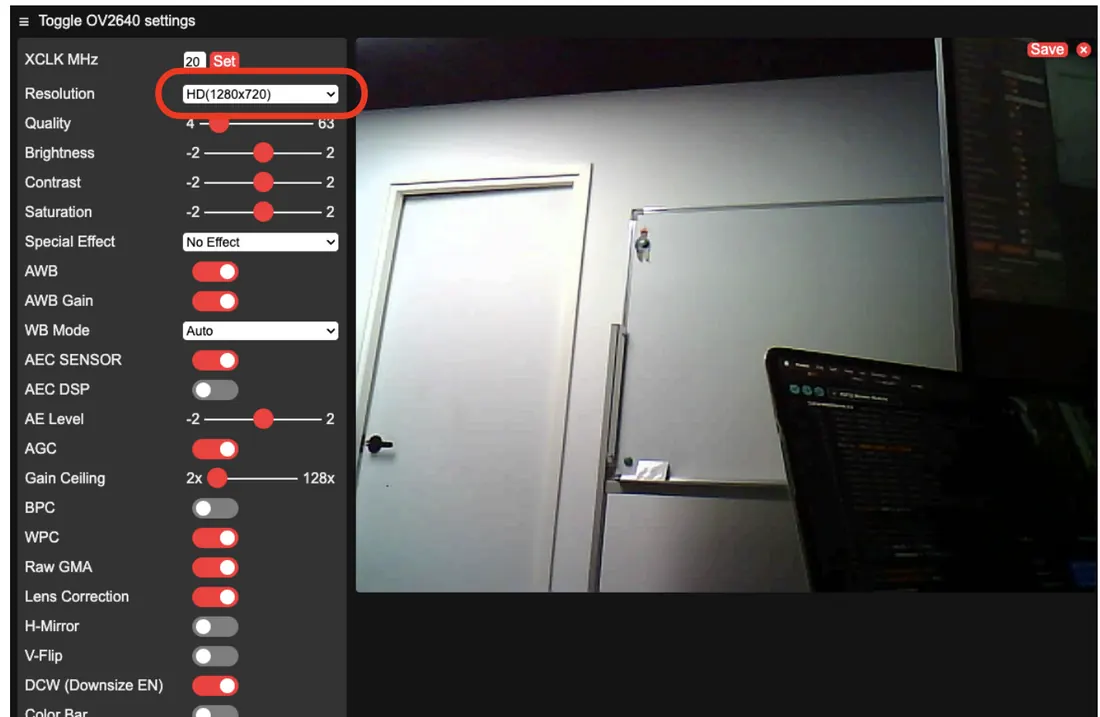
Paste the URL into Chrome. Click "Start Stream" to begin, for better streaming performance, do not exceed 1280x720. |
 |