Part 1: Hardware
Introduction to LCD Displays
|
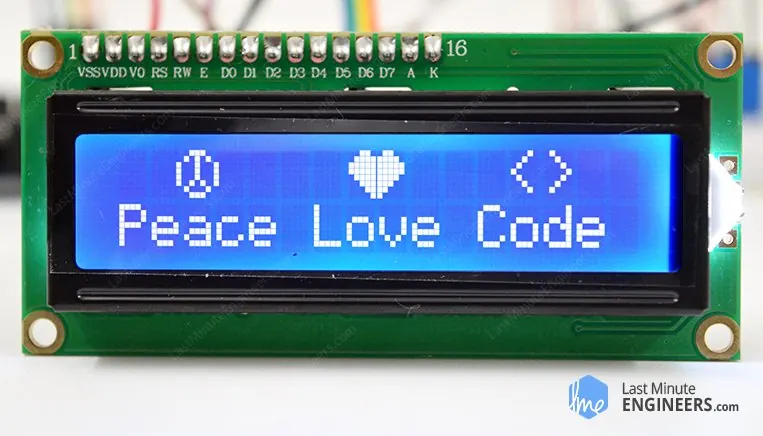
A 16x2 LCD character display is a screen that can show two lines of text with sixteen characters on each line. These displays are often used in electronics projects to provide visual feedback without requiring a computer connection.
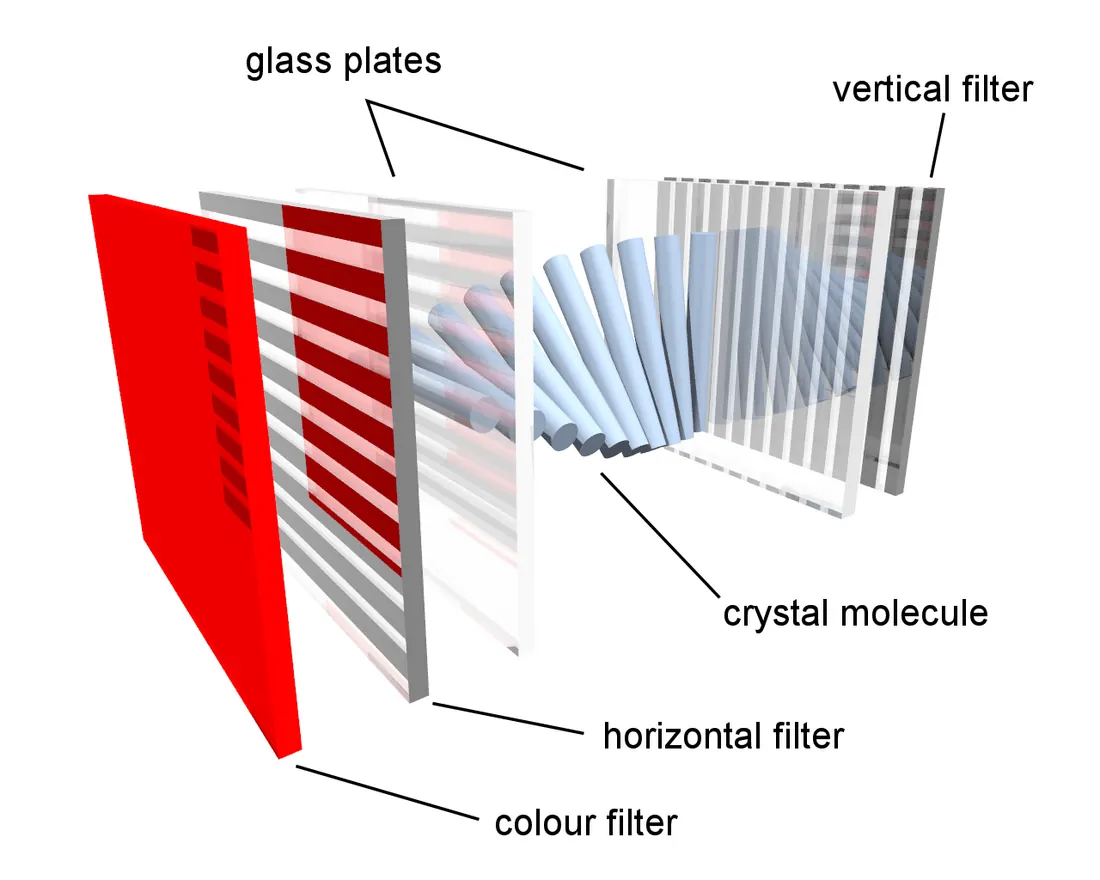
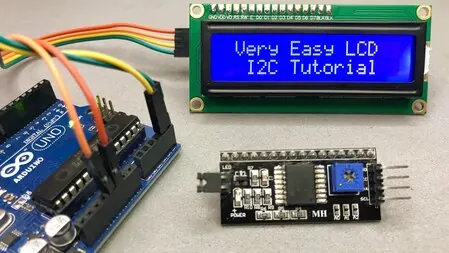
At its core, an LCD screen manipulates light using liquid crystal molecules. The display is backlit, but two polarizing filters block this light from reaching the viewer by default. The first filter polarizes the light waves in one direction (e.g., vertical). The liquid crystal molecules in front of it can be electrically twisted by applying a voltage. When not activated, these twisted molecules rotate the polarized light 90 degrees, allowing it to pass through a second, perpendicular polarizing filter (e.g., horizontal) and making that pixel appear bright. When a voltage is applied to a segment, the liquid crystals untwist, preventing the light from being rotated. The light then remains polarized in the original direction and is blocked by the second filter, making that pixel appear dark. In terms of wiring, connecting an LCD without additional components to an Arduino would typically require many wires—six or more—to control the display. But the I2C Communication Protocol reduced the number of required wires to only 4. Namely: * GND for Ground * VCC for Voltage * SDA for Serial Data * SCL for Serial Clock |
  |
The I2C Communication Protocol
|
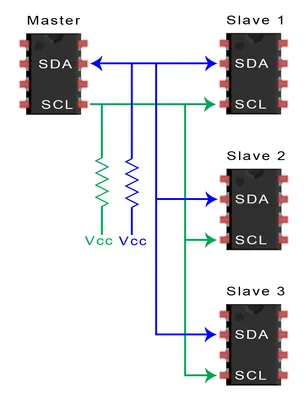
The I2C (Inter-Integrated Circuit) protocol is a method that allows multiple devices to communicate using only two wires, with additional 2 for power and ground. An I2C adapter module can be attached to a standard LCD display to enable this simplified communication. Each device on the I2C bus has a unique address that the Arduino uses to send commands to.
 |
 |
Installing the Necessary Library
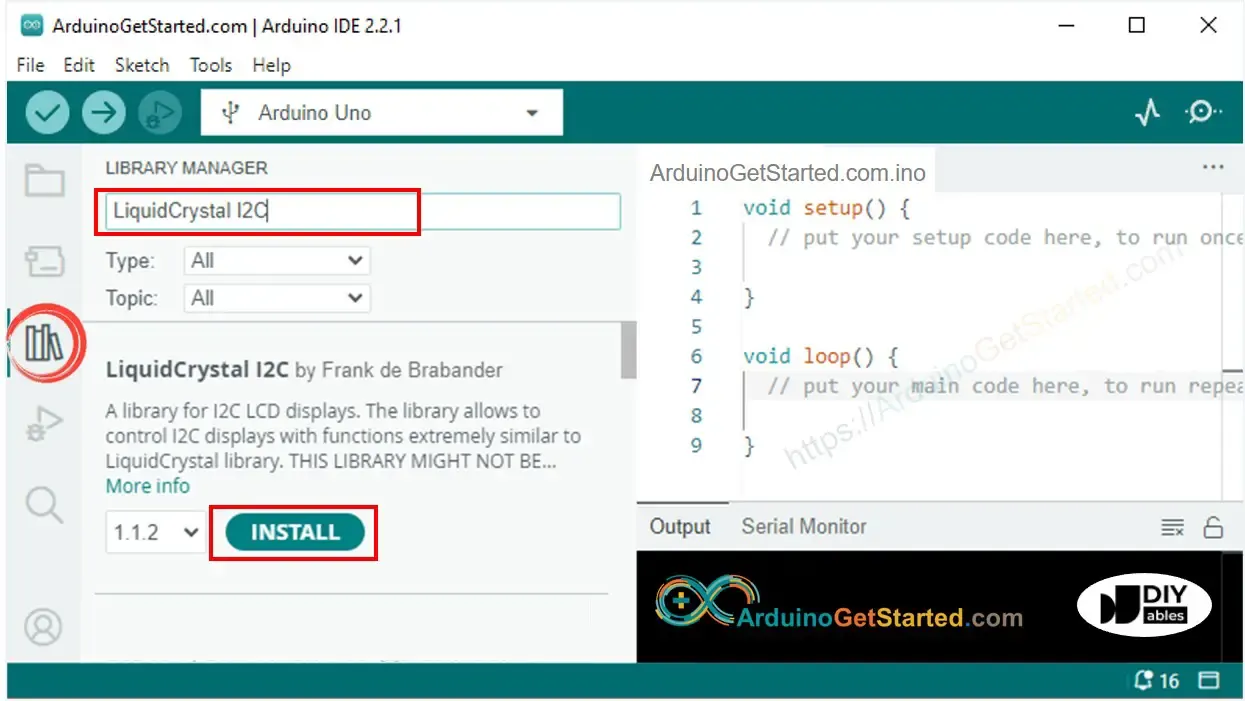
To program the LCD with I2C, you need to install a library in the Arduino IDE. The LiquidCrystal_I2C library provides commands that simplify controlling the display.
After installing the library, you can include it in your code with the line #include <LiquidCrystal_I2C.h>. You must also initialize the display by declaring its address and dimensions, typically with a line such as LiquidCrystal_I2C lcd(0x27, 16, 2);.
After installing the library, you can include it in your code with the line #include <LiquidCrystal_I2C.h>. You must also initialize the display by declaring its address and dimensions, typically with a line such as LiquidCrystal_I2C lcd(0x27, 16, 2);.
LCD I2C Library Reference
#include <LiquidCrystal_I2C.h> //Syntax
LiquidCrystal_I2C lcd(I2C_ADDRESS, COLUMNS, ROWS);

#include <LiquidCrystal_I2C.h> //Example
LiquidCrystal_I2C lcd(0x27, 16, 2);
Displaying Static Messages
|
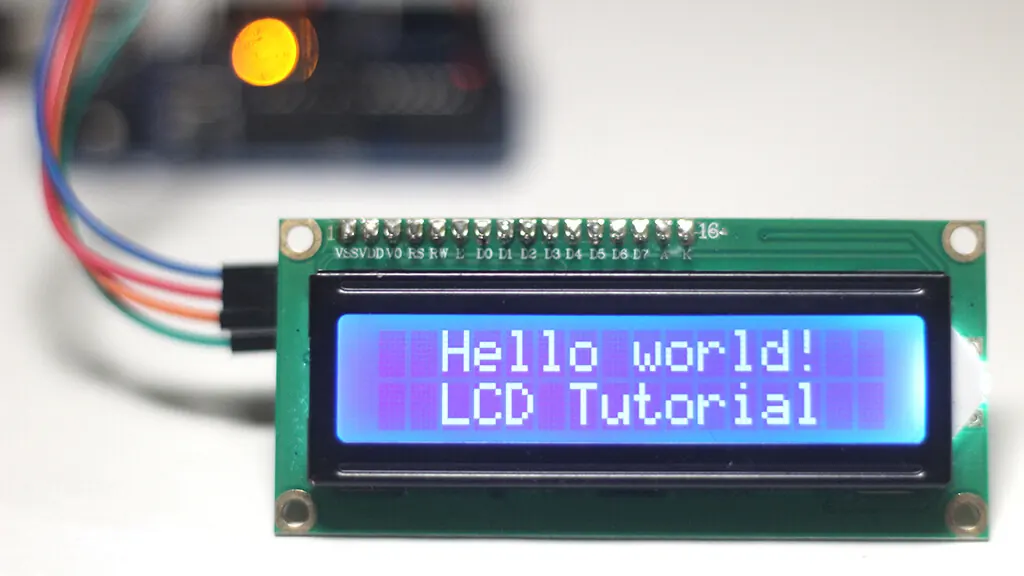
Once the library is set up, you can begin showing text on the screen. The lcd.begin() function prepares the display for use. The lcd.setCursor() command moves the text cursor to a specific position, defined by a column and row number.
To print a message, you use lcd.print("Your text"). The lcd.clear() function is used to erase the entire screen, which is helpful before displaying new information. |
 |
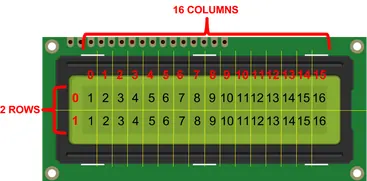
LCD I2C Basic Functions
lcd.begin(); //Syntax
lcd.setCursor(column, row);
lcd.print("Your text");

lcd.begin(); //Example
lcd.setCursor(0, 0);
lcd.print("Hello, World!");
lcd.setCursor(0, 1);
lcd.print("MYP Students");
Showing Dynamic Sensor Data
|
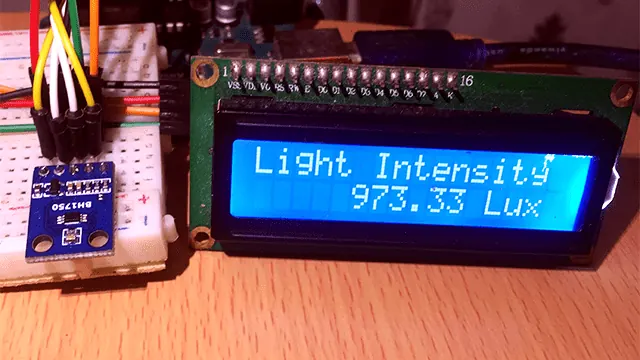
A common application for an LCD is displaying real-time sensor data. For example, you can connect a Light Dependent Resistor (LDR) to read ambient light levels. Using the analogRead() function, the raw sensor value is captured and then converted into a human-readable format for the display.
To make the output clear, combine static text labels with the dynamic values, such as "The value is: [variable]". To avoid a cluttered screen from rapidly changing numbers, remember to clear the previous value by overwriting the specific character positions or the entire line before printing the new reading. The command for clearing screen is included below: |
 |
LDR Light Level LCD Display
lcd.clear();  // Clear the entire screen
lcd.setCursor(0, 0);
lcd.print("The value is: ");
lcd.print(variable);
lcd.print("unit");
delay(2000);
Adjusting Display Settings
|
The LCD display offers several adjustable features. The lcd.backlight() function turns the screen's backlight on or off.
You can also create custom characters by designing them on a 5x8 pixel grid and storing them in the display's memory. (The LCD display has 8 memory positions for custom characters). These characters can then be displayed like standard text, allowing for simple icons or symbols. |
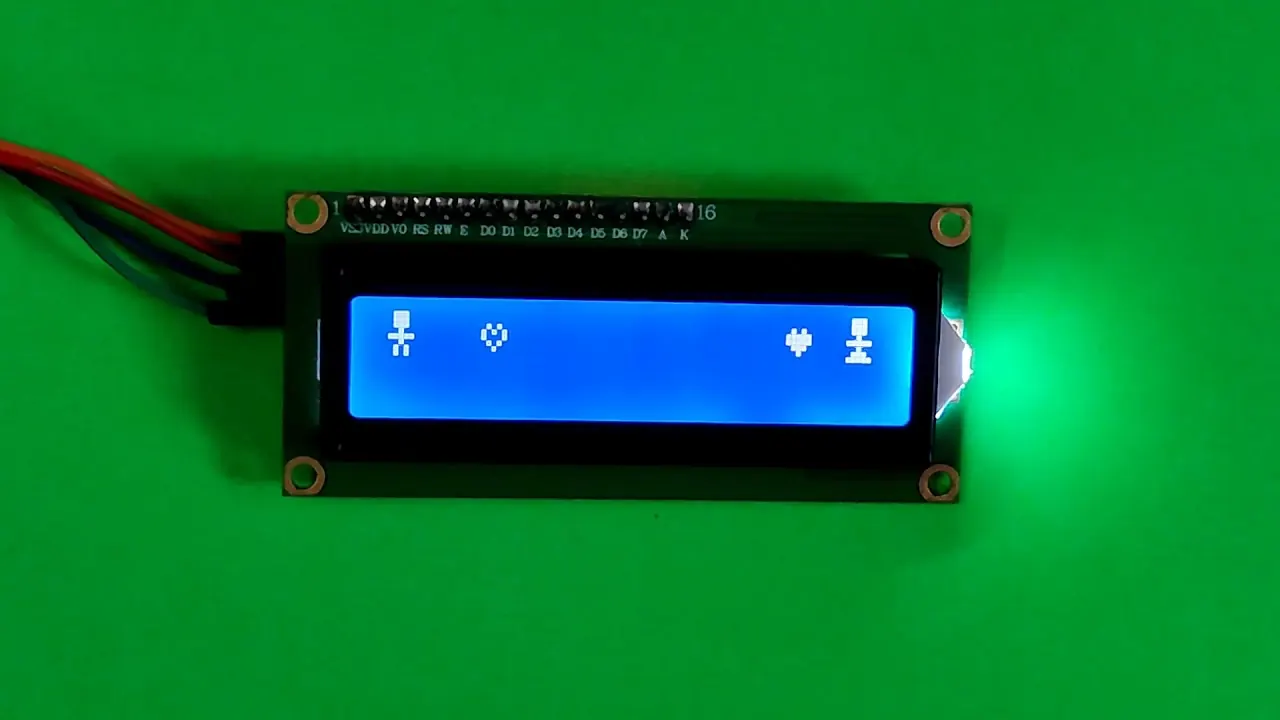 |
Custom Heart Character
// Create a heart symbol on 5x8 grid
byte heart[8] = { //8 rows in total
  B00000,
  B01010,
  B11111,
  B11111,
  B01110,
  B00100,
  B00000,
  B00000
};

void setup() {
  lcd.begin();
  lcd.createChar(0, heart);  // Store in memory position 0, there is a total of 8 memory slots
  lcd.setCursor(0, 0);
  lcd.write(0);  // Display the custom character
  lcd.noBacklight();  // Turn off backlight
  delay(1000);
  lcd.backlight();    // Turn on backlight
  delay(1000);
}
Exercise 1: Personalize Your LCD Display
|
Modify the given code to display your own information on the LCD screen.
|
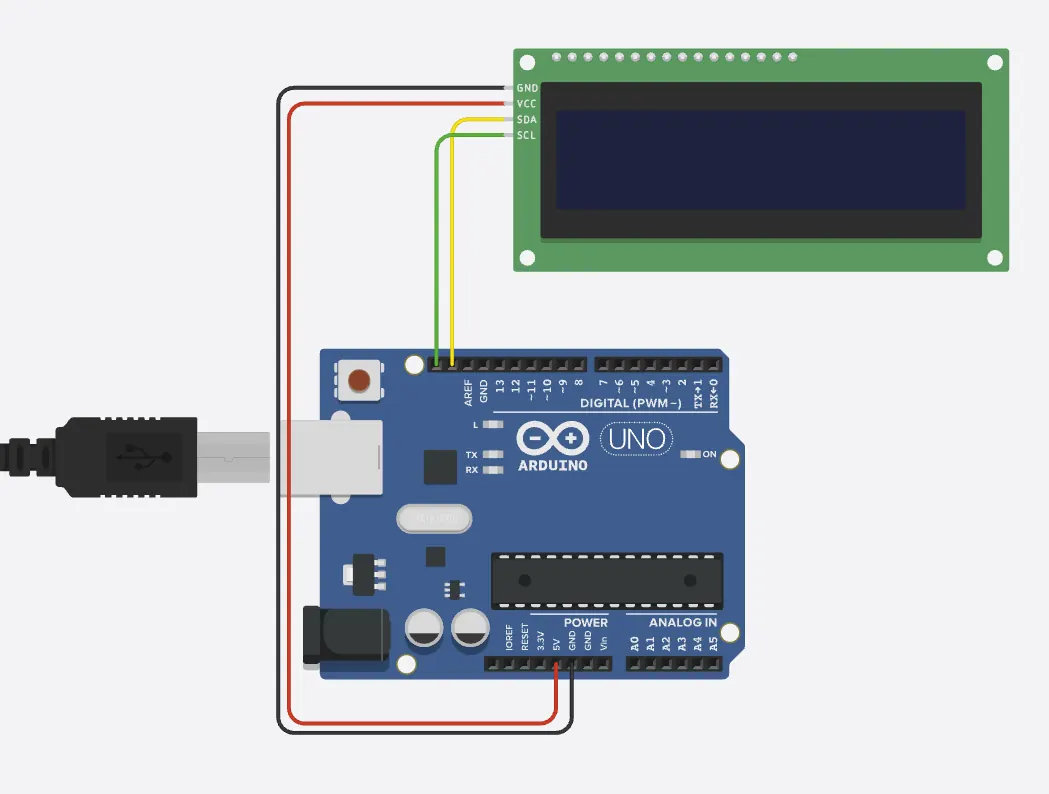 Click the image for the simulation
|
Alternating LCD Messages
#include <LiquidCrystal_I2C.h>

LiquidCrystal_I2C lcd(0x26, 16, 2);

void setup()
{
  lcd.init();
  lcd.backlight();
}
void loop()
{
  lcd.setCursor(0,0);
  lcd.print("My name is:");
  lcd.setCursor(0,1);
  lcd.print("Kay");
  delay(1000);
  lcd.clear();

  lcd.setCursor(0,0);
  lcd.print("I like:");
  lcd.setCursor(0,1);
  lcd.print("Cat");
  delay(1000);
  lcd.clear();
}
Exercise 2: Create Personalized LCD Characters
Modify the code below to design and display custom characters on the LCD screen.
LCD Message Sequence with Heart
#include <LiquidCrystal_I2C.h>

LiquidCrystal_I2C lcd(0x26, 16, 2);

byte heart[8] = {
  B00000,
  B01010,
  B11111,
  B11111,
  B01110,
  B00100,
  B00000,
  B00000
};

void setup()
{
  lcd.init();
  lcd.backlight();
  lcd.createChar(0, heart);     // Store character at position 0
}
void loop()
{
  lcd.setCursor(0,0);
  lcd.print("My name is:");
  lcd.setCursor(0,1);
  lcd.print("Kay");
  delay(1000);
  lcd.clear();

  lcd.setCursor(0,0);
  lcd.print("I like:");
  lcd.setCursor(0,1);
  lcd.print("Cat");
  delay(1000);
  lcd.clear();

  lcd.setCursor(0,0);
  lcd.write(0);   //Call character from position 0
  delay(1000);
  lcd.clear();
}