G. Install the Solar Panel
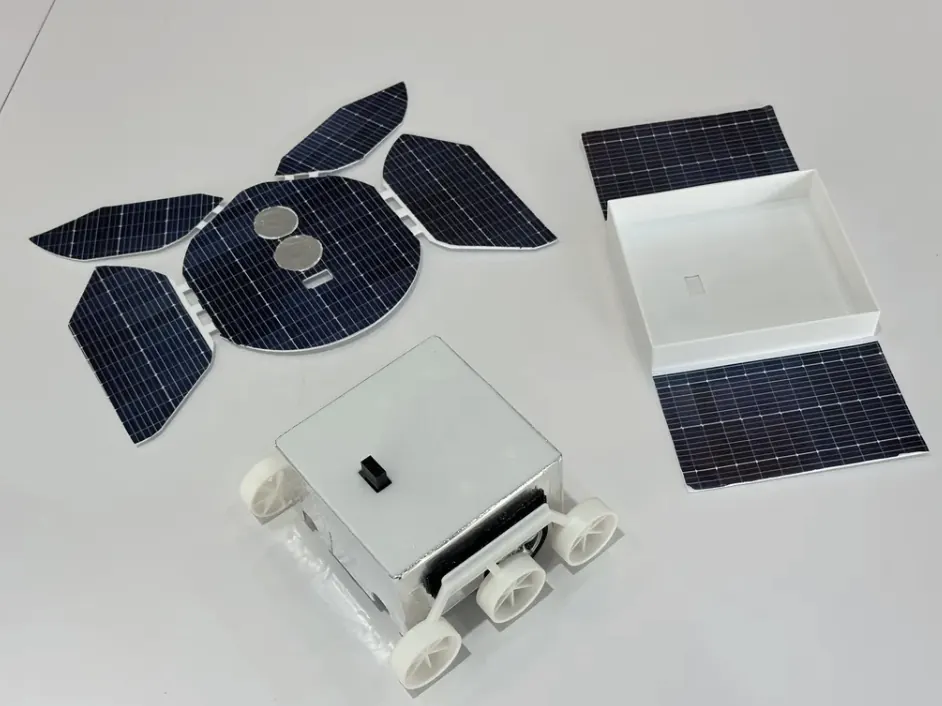
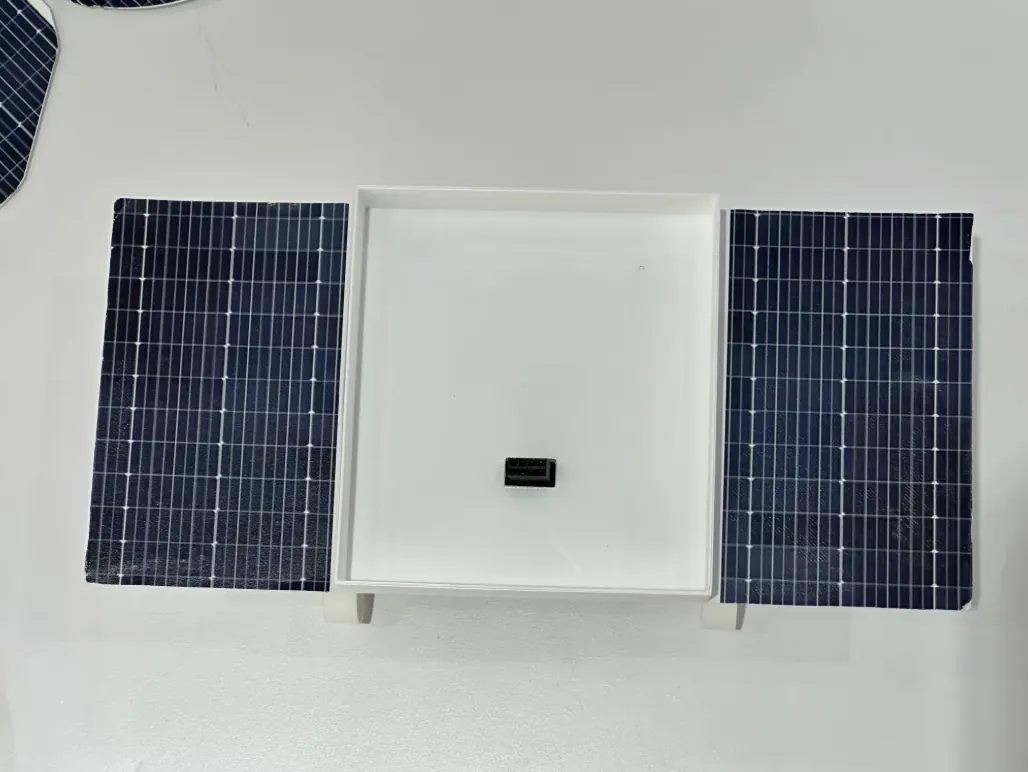
This step is to choose which rover you want to be for your project. Your kit comes with two different "solar panels," allowing you to swap the top of your rover. One is designed to look like the Yutu (Moon) rover, and the other is inspired by the Zhurong (Mars) rover.
1. Choose Your Solar Panel
Decide whether you want your rover to be a lunar explorer (Yutu rover) or a Martian explorer (Zhurong rover) today.
1. Choose Your Solar Panel
Decide whether you want your rover to be a lunar explorer (Yutu rover) or a Martian explorer (Zhurong rover) today.
2. Place the Solar Panel on Top
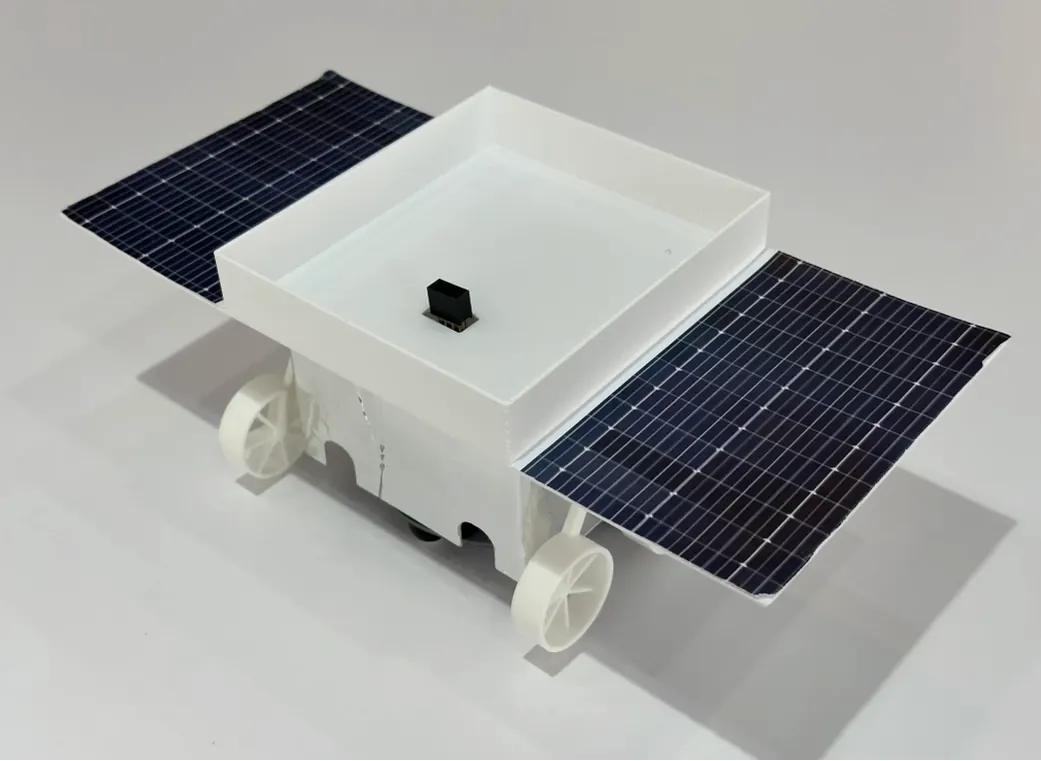
The solar panel is designed to fit snugly on top of the rover's main body. Gently place your chosen solar panel on top of your your rover's main shell. It will cover the shell and complete the look. Make sure to align the the ultrasonic sensor extender square hole with your solar panel. If there is a solar panel sticker covering the square hole, then make sure to cut a clean square hole through it to make sure that the the ultrasonic sensor can be easily installed on top of the solar panel.
The solar panel is designed to fit snugly on top of the rover's main body. Gently place your chosen solar panel on top of your your rover's main shell. It will cover the shell and complete the look. Make sure to align the the ultrasonic sensor extender square hole with your solar panel. If there is a solar panel sticker covering the square hole, then make sure to cut a clean square hole through it to make sure that the the ultrasonic sensor can be easily installed on top of the solar panel.
3. Attaching the Rover Hat
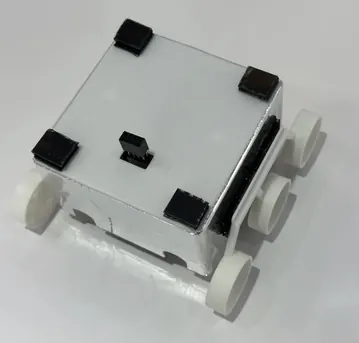
To attach the hat, we will use the hook-and-loop tape. This will create a connection that is strong enough to hold the hat securely in place, but also allows you to remove it gently whenever you want to swap designs. You will need four pairs of the tape. Place one piece from each pair on the four corners of the rover's top shell. Then, stick the matching four pieces onto the corresponding spots on the inside of the rover hat. This ensures that when you press the hat down, it will lock into place.
To attach the hat, we will use the hook-and-loop tape. This will create a connection that is strong enough to hold the hat securely in place, but also allows you to remove it gently whenever you want to swap designs. You will need four pairs of the tape. Place one piece from each pair on the four corners of the rover's top shell. Then, stick the matching four pieces onto the corresponding spots on the inside of the rover hat. This ensures that when you press the hat down, it will lock into place.
 |
 |
H. Installing the Main Shell onto the Cutebot
Now it's time to put all our prepared pieces together to form the main rover.
1. Align the Shell onto the Cutebot Body
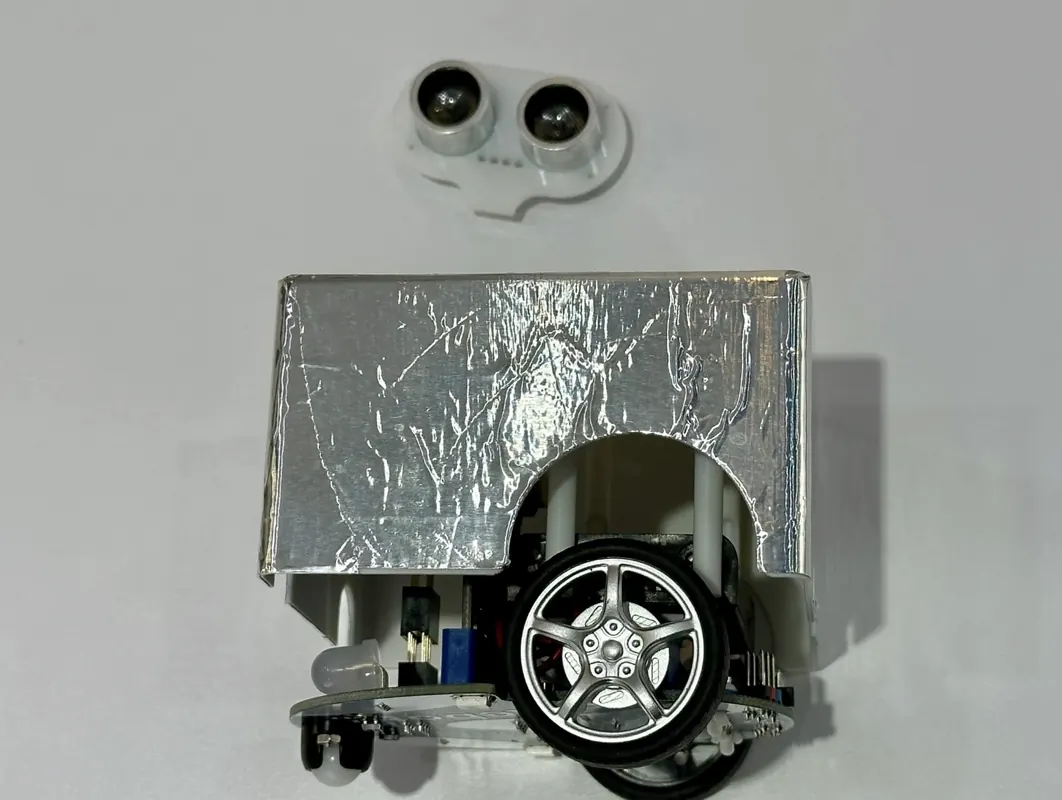
Take your foil-covered shell and place it over the top of the Cutebot chassis. Ensure that you plug all of the four extenders stacked together into the socket where the ultrasonic sensor used to be located (Do not plug the ultrasonic sensor into the other end of the extender yet). Carefully align the shell so that the wheels have space to move and the ultrasonic sensor is positioned correctly at the front.
1. Align the Shell onto the Cutebot Body
Take your foil-covered shell and place it over the top of the Cutebot chassis. Ensure that you plug all of the four extenders stacked together into the socket where the ultrasonic sensor used to be located (Do not plug the ultrasonic sensor into the other end of the extender yet). Carefully align the shell so that the wheels have space to move and the ultrasonic sensor is positioned correctly at the front.
2. Secure the Shell with Screws
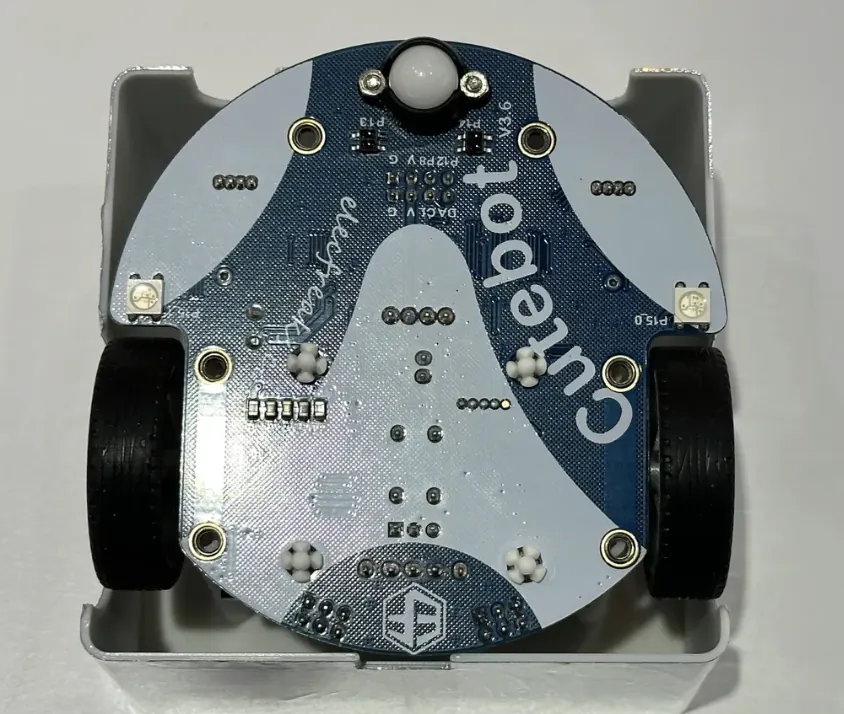
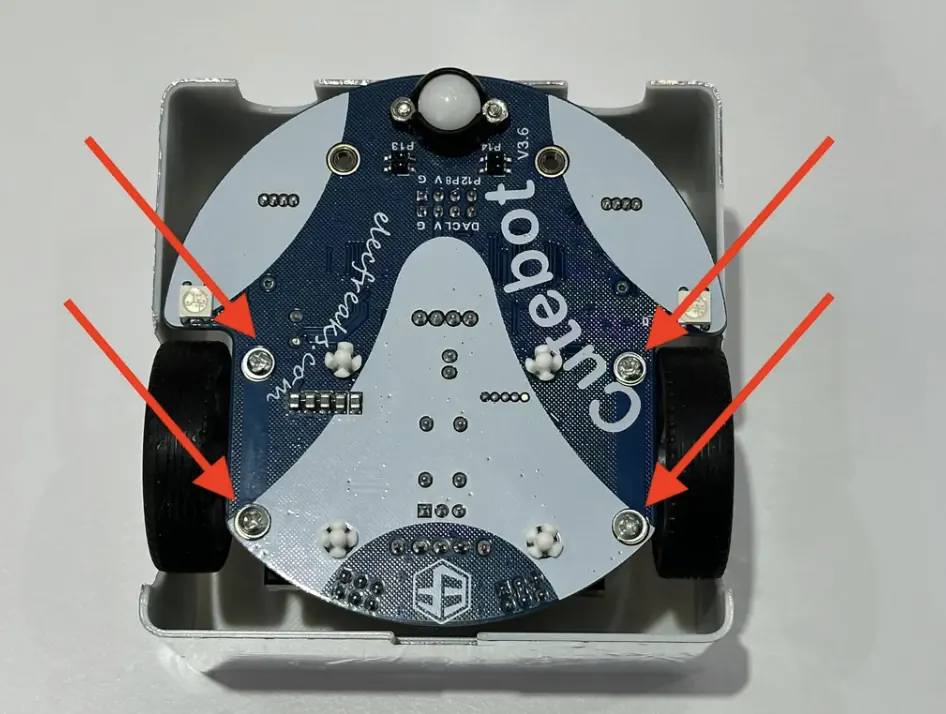
Turn the Cutebot over. Use the four screws provided in your kit to attach the shell securely to the car body. The screws will go into the four holes on the bottom of the Cutebot. This fastens the shell and completes the main assembly.
Turn the Cutebot over. Use the four screws provided in your kit to attach the shell securely to the car body. The screws will go into the four holes on the bottom of the Cutebot. This fastens the shell and completes the main assembly.
 |
 |
3. Install the Ultrasonic Sensor onto the Extender
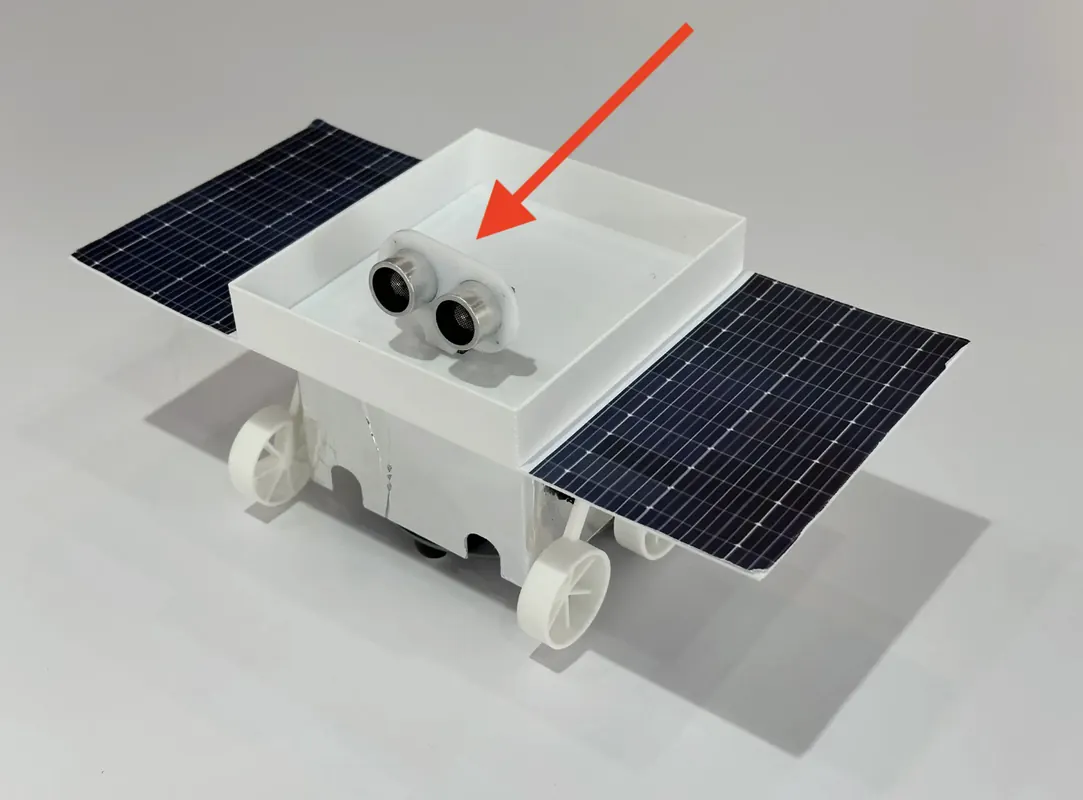
The final step is for you to plug the ultrasonic sensor at the top end of the 4-stacked extenders through the square hole of the main shell and also the solar panels. The ultrasonic sensor should be securely connected and sticking out on top part of your rover. You have now successfully assembled the main body of your Cutebot Rover. It's starting to look like a real planetary explorer.
The final step is for you to plug the ultrasonic sensor at the top end of the 4-stacked extenders through the square hole of the main shell and also the solar panels. The ultrasonic sensor should be securely connected and sticking out on top part of your rover. You have now successfully assembled the main body of your Cutebot Rover. It's starting to look like a real planetary explorer.